News


Recent comments
-
Thanks so much for this
-
Thank you for the information
-
Based on the serial number
-
Pics
-
The serial number confirms
An Inexpensive Wheel Truing Stand
Hi All!
I hope you all don't mind that i posted this in the Vintage CCM Bicycles Section, since thta seemed like the most appropriate forum section for tools. I also hope you don't mind that I posted it at all, but I wanted to place it here in case anyone would find a cheap-to-build truing stand helpful. I was getting kind of frustrated trying to straighten a badly wapred wheel on the bicycle, so I donated a couple of hours to building this tool. (Plus about 10 pencil and paper hours trying to figure out what I wanted....)
The stand I'm showing in the photos was made from parts I had laying around. For fun, I priced the parts and came up with about 22.00 USD, if the stainless steel angles are substituted with non-stainless or aluminum.
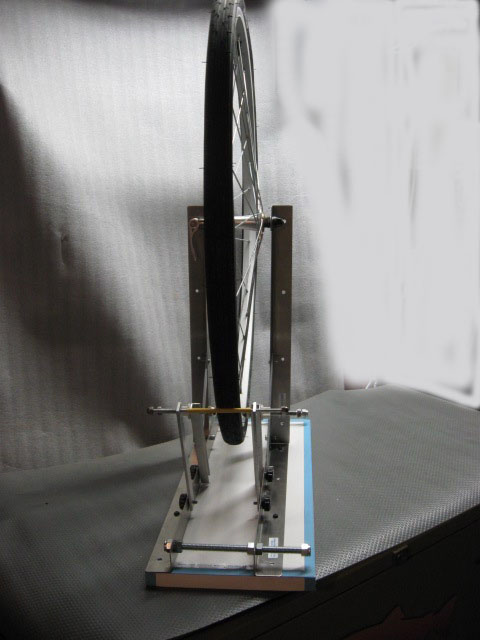
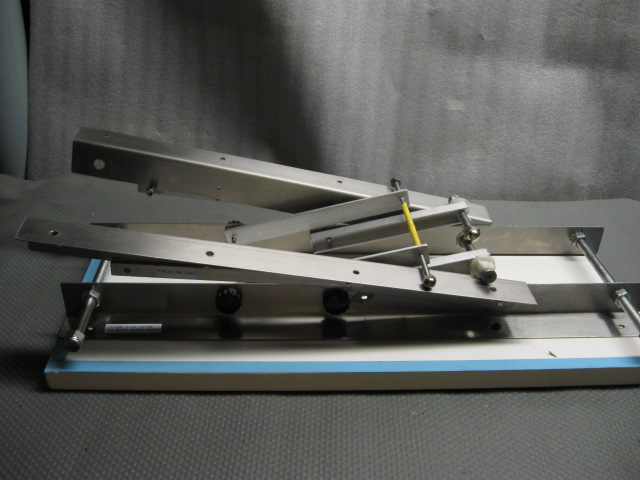
The entire stand folds nearly flat for storage in about a minute's time. The photo shows it tied with a shoelace, but later I found that tying isn't necessary. It stays folded.
It takes wheels from 16" to something over 32" diameter. The indicating arms wil reach all of those sizes, as will the vertical truing bar (the yellow thing). Shorter wheels can be mounted if a lower hole on the vertical arm is chosen or if the width gague arms are moved to a forward hole. I haven't needed such a small size yet.
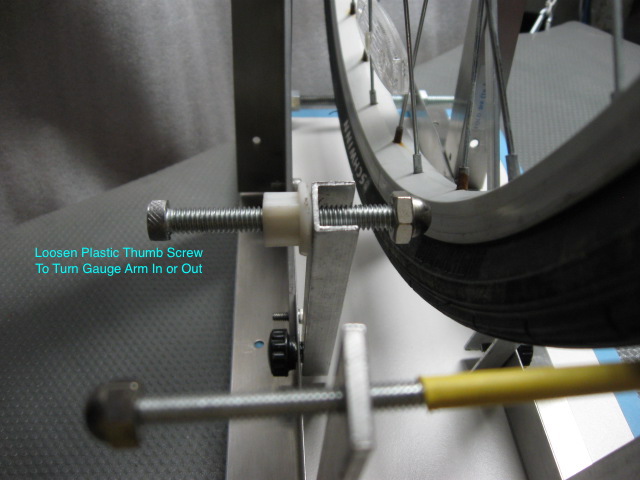
The stand can be used to true a horizontally out-of-round wheel by tilting the gague arms to meet the brake area of the rim and screwing them on the movable brackets closer or further from the rim. They are locked into position by the two white hand-nuts, which are actually toilet seat hinge nuts. (Gee Whiz, I save too much stuff!)
For oblique out-of-round adjustments (vertical true?), the tire is removed and the threaded rod is moved to the edge of the wheel and locked in with the thumb screws. For badly oblique wheels, it will be deflected out of the way in case it's adjusted too close by mistake.
For dishing, I simply install the wheel & measure the distance from the hub flange to the vertical arm, then flip the wheel & measure again. It isn't the fastest method, but works for now.
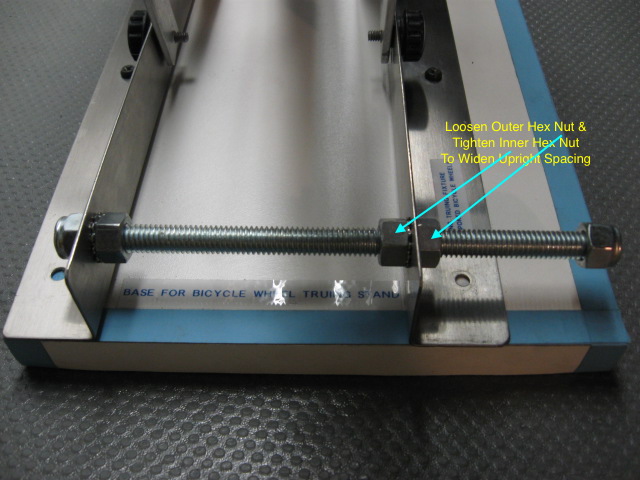
Different width wheels are accomodated by loosening the jam nuts on the horizontal 3/8-16 threaded rods & moving only the right side horizontal bracket & (optionally) screwing it into the base at the correct position. The jam nuts are then snugged up. I have tried without screwing the horizontal bracket in & the stand holds firmly. A badly out-of-true whel or a heavy wheel might need the horizontal arm to be screwed to the base. (The acorn nuts on the ends of the rods are of no purpose other than appearance.)
Changes I Would (or will) Make-
I'd install threaded inserts on the base, to the right of the photographed position, at the width for each wheel width that I need. I would use thumb screws instead of the particle board screws that are there now.
The acron nuts on the ends of the pointers for truing wil get a hard plastic disc glued on so they don't put marks on aluminum wheels in the event that I goof and let them scrape on the rim. Optionally, I'll get nylon or aluminum acorn nuts.
I'll make a holder for a pair of dial indicators instead of the gauge arm rods, but only if I find that I want way too much precision for my bicycles!
The holes for the axles will be slotted to the top of the vertical arms for faster wheel reversing while checking for dishing. As-Built, I just used the top holes that were in the angle stock already.
The hex nuts on the width adjusting threaded rods will be knurled thumb nuts that I'll make next time I have some scrap.
Materials-
The horizontal & vertical angles are 20 inches long & 1-1/2 x 1-1/2 x 1/8" #316 stainless steel. They are old pop machine brackets from fountain machines like those in restaurants.
The base is an old shelf. The yellow out-of-round indicator is a 1/4-20 threaded rod with shrink tube on it. The flat bars are 6061 alloy aluminum scrap flat stock that is 1" wide and 1/8" thick.
The horizontal threaded "width adjusting rods" are scraps of 3/8-16 threaded rod left from a recent conduit hanging job. The black, plastic thumb screws are from a refrigerator fan cover.
I hope this is helpful if you decide to add a fun bicycle tool to your fleet!
Enjoy Today!
Paul![]()